In the last days, I looked into various Reverse Proxy solutions, to solve a problem in my Homelab. Let me describe what problem I faced, what I tried and what I ended up with.
The problem
When I set up paperless-ngx, I decided to make the website publicly accessible. Unlike other services, that contain critical data, I did not want to set up HTTP Basic Authentication, because I wanted to access the API through various mobile apps.
After I started using the service more and more, the amount of critical data increased dramatically, and I did no longer want to have it publicly accessible.
Then I got the iPhone 15 Pro Max, and I discovered an app, named Swift Paperless. I really liked the design of the app, but I was not able to use it because it requires a valid SSL Certificate for the server to connect to.
The need for an internal reverse proxy with valid SSL certificates was born.
Initial idea
I started thinking about the possibilities to realize this. My first attempt was to restrict the access through the HTTP Access Module in the Nginx Proxy Manager. But this was not working properly, I was able to access the site in my local network, but not through VPN. Another Problem was the "Limit IP Address Tracking" feature of Apple devices.
So I needed to set up a separate Reverse Proxy, that did not need to publish 2 ports to obtain valid SSL certificates. I have used acme.sh before, but I wanted an all-in-one solution, preferably only one Docker container. My options were Traefik and Caddy.
I began playing around with Caddy, because Traefik had multiple configuration ways and felt too complex for my rather simple task.
Caddy DNS Module
The problem was that I needed this caddy-dns/netcup module, to manage DNS records with the Netcup DNS API. I started using the caddy binary for Netcup, obtained through the download page. The binary did its job, but it was pretty annoying to move the binary, add a caddy user, configure the systemd unit and other stuff. A Dockerfile, utilizing multi-stage builds, was the solution.
Netcup DNS propagation
The problem I spent the most time with, were many different error messages on retrieving the correct TXT record for the DNS record. After many attempts, I finally found this note on certbot-dns-netcup:
NOTE: You may need to set an unexpectedly high propagation time (≥ 900 seconds) to give the Netcup DNS time to propagate the entries! This may be annoying when calling certbot manually, but should not be a problem in automated setups. In exceptional cases, 20 minutes may be required. See #28.
So I needed to increase the propagation_timeout for Caddy.
Final config
The config I ended up with is this Dockerfile to build Caddy with a multi-stage build to create smaller Docker images by using multiple build stages and overlaying the newly-built binary on top of the regular caddy image:
FROM caddy:2-builder AS builder

RUN xcaddy build --with github.com/caddy-dns/netcup

FROM caddy:2

COPY --from=builder /usr/bin/caddy /usr/bin/caddy
The service in the docker-compose.yml:
(It is possible to build the Dockerfile from ./caddy/Dockerfile with docker compose build. Then the container can be started with docker compose up -d)
  caddy:
    image: peterge/caddy-netcup
    build: ./caddy
    restart: unless-stopped
    ports:
      - "80:80"
      - "443:443"
      - "443:443/udp"
    volumes:
      - /root/caddy/Caddyfile:/etc/caddy/Caddyfile
      - /root/caddy/data:/data
      - /root/caddy/config:/config
    labels:
      - "com.centurylinklabs.watchtower.enable=false"
And finally the Caddyfile which configures the behavior of Caddy:
{
	acme_ca https://acme-v02.api.letsencrypt.org/directory
	email name@domain.tld
}

paperless.peterge.de {
	tls {
		dns netcup {
			customer_number <number>
			api_key <key>
			api_password <password>
		}
		propagation_timeout 900s
		propagation_delay 600s
		resolvers 1.1.1.1
	}
	reverse_proxy http://10.0.4.104:8000
}
This results in a valid SSL certificate. The log looks like this:
{"level":"info","ts":1702068023.1154647,"logger":"tls.issuance.acme.acme_client","msg":"authorization finalized","identifier":"paperless.peterge.de","authz_status":"valid"}
{"level":"info","ts":1702068023.1155019,"logger":"tls.issuance.acme.acme_client","msg":"validations succeeded; finalizing order","order":"https://acme-v02.api.letsencrypt.org/acme/order/1455199236/227814303096"}
{"level":"info","ts":1702068023.8258874,"logger":"tls.issuance.acme.acme_client","msg":"successfully downloaded available certificate chains","count":2,"first_url":"https://acme-v02.api.letsencrypt.org/acme/cert/035e03ad110e5f5974932f7e2d0b0fc51984"}
{"level":"info","ts":1702068023.8264737,"logger":"tls.obtain","msg":"certificate obtained successfully","identifier":"paperless.peterge.de"}
{"level":"info","ts":1702068023.826638,"logger":"tls.obtain","msg":"releasing lock","identifier":"paperless.peterge.de"}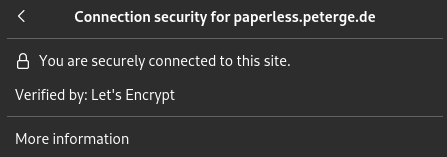
And most important: Swift Paperless on iOS does not complain anymore! 😋